我们在日常各种网页中上传文件都是通过选择进行上传的,那么今天我们来讲讲有关于:“ 在html5的AmazeUI中怎么实现文件选择域效果? ”这个问题吧!下面是有关于这个问题的内容分享!
文件选择域
<input type="file"> 也是 CSS 啃不动的一块骨头,如果实在看不惯原生的样式,一般的做法是把文件选择域设为透明那个,覆盖在其他元素。
<div class="am-form-group am-form-file">
  <button type="button" class="am-btn am-btn-default am-btn-sm">
    <i class="am-icon-cloud-upload"></i> 选择要上传的文件</button>
  <input type="file" multiple>
</div>

<hr/>

<div class="am-form-group am-form-file">
  <i class="am-icon-cloud-upload"></i> 选择要上传的文件
  <input type="file" multiple>
</div>
效果如下:
![]()
但是官方给的方案一个问题在于,上传文件之后图标没有改变,也没有显示上传文件名的地方。
于是我做了一个小小的修改:加入一段js代码:
$('input[type="file"]').change(function (event) {
    var that = this;
    var file = $(that)[0].files[0];
    if(file){
        $(that).prev().text(that.files[0].name);
        $(that).attr({ 'src': window.URL.createObjectURL(that.files[0]) });
    }
});
上传文件后

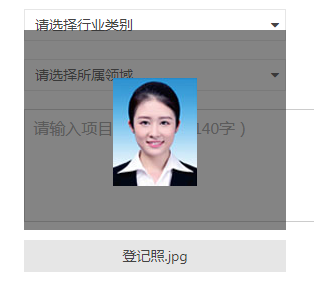
进一步的,如果传的是图片,我想预览上传的图片效果图呢。
那就再加一段小代码:
$('input[type="file"]').closest('div').hover(function(){
    if($(this).find('input[type="file"]').attr('src')){
        $('body').append('<div class="imgView" style="width: '+$(this).find('button').css('width')+';top: '+($(this).find('button').offset().top-210)+'px;left: '+$(this).find('button').offset().left+'px;height: 200px;position: absolute;text-align: center;line-height: 200px;z-index: 99999;background-color: rgba(51, 51, 51,0.6);"><img style="max-width: 90%;max-height: 90%;" src="'+$(this).find('input[type="file"]').attr('src')+'"></div>')
    }
},function(){
    $('.imgView').remove();
});

当鼠标放上面就会自动显示上传图片的缩略图了。
转载于:https://my.oschina.net/u/3463305/blog/1504565
总结
那么上面就是有关于:“在html5的AmazeUI中怎么实现文件选择域效果?”这个问题的相关内容分享!在大家阅读问之后想必就知道了怎么实现文件选择这个方法了,更多关于Amaze UI这方面的相关内容我们都可以在W3Cschool中进行学习!

 免费AI编程助手


